PCB layout for IoT devices is more demanding than layout for non-wireless products. A poorly placed antenna, a ground plane gap in the wrong place, or improper power supply filtering can turn a well-designed circuit into a device that fails regulatory testing, has poor wireless range, or generates interference that disrupts co-located electronics. These problems are painful to debug, often require a PCB respin to fix properly, and can push a product launch by months. This guide distills the most important PCB design principles specifically for wireless IoT devices — with concrete, actionable guidance rather than hand-wavy generalities.
Understand Your Stackup Before You Route
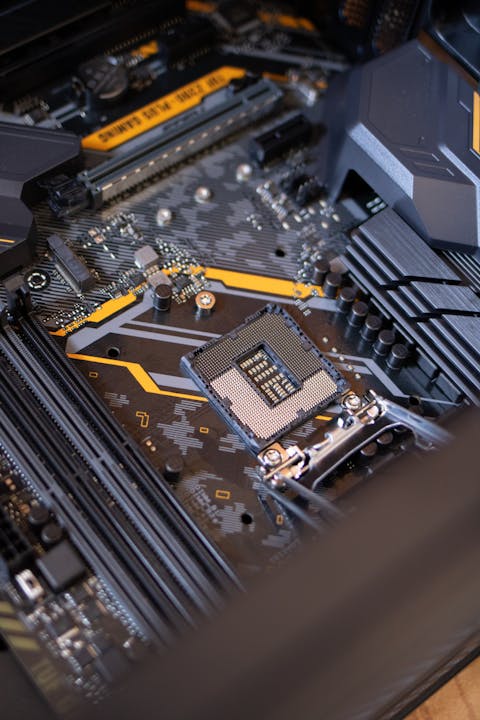
The PCB stackup — the arrangement of copper layers and dielectric materials — affects impedance calculations, ground plane effectiveness, and thermal performance. Most prototype PCBs use a 2-layer, 1.6mm FR4 stackup, which is the default for most PCB fabs. But for wireless IoT devices, understanding what this means is important.
2-layer stackup (most IoT prototypes):
- Layer 1 (top): Signal routing, components
- Layer 2 (bottom): Ground plane (ideally mostly unbroken ground)
4-layer stackup (preferred for complex IoT designs):
- Layer 1 (top): Signal routing
- Layer 2: Ground plane (continuous)
- Layer 3: Power plane
- Layer 4 (bottom): Signal routing
A 4-layer board provides a more consistent reference plane for impedance-controlled RF traces, better power distribution, and reduced EMI. For any product with tight EMC requirements or high-frequency signals, 4-layer is worth the modest cost premium.
Dielectric constant (Dk) matters for impedance: Standard FR4 has Dk ≈ 4.2–4.5, but this varies with frequency and moisture absorption. For accurate 50Ω trace width calculations, use the actual Dk from your PCB fab’s material specifications, not a generic FR4 value. Use an impedance calculator tool (Saturn PCB Toolkit is free and excellent) with your fab’s stackup parameters.
Antenna Placement: The Most Critical IoT PCB Decision
Antenna placement determines wireless performance more than any other PCB design decision. Getting this wrong can cost you 3–6 dB of link budget — enough to halve your range or cause intermittent connectivity in environments that should be well within spec.
Module antenna keepout zones: Every RF module datasheet specifies a keepout area around the antenna — a zone where no copper should be present on any layer. This is non-negotiable. Examples:
- ESP32-WROOM-32 module: The integrated PCB antenna requires a keepout area of approximately 3.5mm x 3mm with no copper on any layer
- Nordic nRF52 module with PCB trace antenna: Similar keepout requirements
Violating the keepout zone detunes the antenna by changing the ground plane geometry around it. The return loss (S11) worsens, meaning less power is transmitted and received.
Edge placement for better radiation: Position the antenna at the edge or corner of the PCB, with the radiating element facing outward. The PCB ground plane itself acts as a reflector/ground reference for the antenna — keeping the antenna away from the bulk of the PCB allows it to radiate more freely into the surrounding space.
Orientation matters: Typical ceramic chip antennas and PCB trace antennas have a radiation null along their axis (they’re dipole-like). Consider the orientation of the antenna relative to expected communication directions. For a device mounted on a wall, ensure the antenna’s maximum gain pattern points toward where the access point or gateway will be, not into the wall.
Enclosure effects: Metal enclosures detune antennas severely — the enclosure acts as a Faraday cage. Plastic enclosures have minimal effect on most antenna designs, but very thick plastic (>3mm) near the antenna can affect performance. Test in the final enclosure, not just on the bare PCB.
If using an external antenna via U.FL/SMA: Route the coaxial connector as close as possible to the module’s RF pin. The coax cable has its own impedance characteristics; use 50Ω coax and minimize cable length. External antennas generally provide better performance and placement flexibility than integrated antennas.
RF Trace Impedance: 50Ω or Nothing
Any RF transmission line — the trace carrying RF signal between the SoC and the antenna, or between the SoC and an external connector — must be a controlled impedance trace matched to 50Ω.
Why 50Ω: RF systems are designed around 50Ω impedance by convention. A mismatch between the source (SoC RF output, typically 50Ω), the transmission line, and the load (antenna, typically 50Ω) causes reflections that reduce transmitted power and can stress the PA.
Microstrip trace width for 50Ω on 2-layer, 1.6mm FR4: Using Dk = 4.3, copper thickness = 35µm (1oz):
- 50Ω microstrip width ≈ 2.8mm
This is calculated using: W = (87 / √(Dk + 1.41)) × ln(5.98H / (0.8W + T)) Use Saturn PCB Toolkit or a similar calculator with your actual stackup parameters.
Keep RF traces short: Every millimeter of RF trace adds parasitic inductance and loss. Route from the MCU RF output pin to the antenna matching network to the antenna as directly as possible.
RF trace routing rules:
- No 90-degree corners on RF traces — use 45-degree bends or smooth curves
- No vias in the RF trace path (vias add inductance and impedance discontinuities)
- Keep other signal traces away from the RF trace — at least 3× the RF trace width clearance
- Maintain uninterrupted ground plane beneath the RF trace
Antenna Matching Network
Most RF modules include an antenna matching network (typically a Pi or L-network of inductors and capacitors) between the SoC RF output and the antenna. This network transforms the antenna’s complex impedance to 50Ω.
On modules like the ESP32-WROOM or nRF52840 module, the matching network is pre-tuned and you simply connect the module’s antenna terminal to your antenna (or follow the module’s PCB trace antenna layout guidelines). If you’re using a bare SoC with an external antenna, you need to design and tune the matching network yourself.
Matching network tuning requires a vector network analyzer (VNA) to measure S11 (return loss) and adjust component values. For prototyping, use NanoVNA — an inexpensive but capable entry-level VNA. Production matching validation requires a proper benchtop VNA.
Leave component footprints for 0402 inductors and capacitors in the matching network so you can adjust values if initial RF performance is poor.

Power Supply Design for RF IoT Devices
RF transmissions create brief, high-current spikes on the power supply. A 2.4 GHz radio transmitting at +10 dBm (10mW) draws ~100mA peak from a 3.3V supply — a current that can cause supply voltage dips if the power supply is inadequately bypassed.
Bulk capacitance: Place 10–47µF low-ESR capacitors (ceramic X5R or X7R, not tantalum or electrolytic) close to the RF module supply pins. These provide the bulk current for RF transmission spikes.
High-frequency decoupling: Place 100nF and 10nF ceramic capacitors within 1–2mm of every IC power pin. These suppress high-frequency noise generated by switching digital logic.
Separate analog and digital supplies: If your design includes analog circuits (ADC, precision reference, sensor signal conditioning), keep the analog supply separate from the digital supply, using a ferrite bead or small inductor to isolate the two. Digital switching noise is a primary source of ADC measurement error.
Power rail routing: Use power planes (or wide copper pours) for supply distribution on a 2-layer board. Narrow traces for power rails create inductance that degrades high-frequency supply rejection.
LDO vs. switching regulator:
- LDOs are simple, low-noise, and have good high-frequency rejection — ideal for sensitive analog circuits
- Switching regulators (buck, boost) are efficient but generate switching noise at their frequency (typically 100kHz–4MHz) — keep them physically away from RF circuits and filter their output
Ground Plane Design
A solid ground plane is the foundation of good EMC and RF performance. Rules:
Never slot the ground plane under RF circuits: Traces routed under an RF circuit on the opposite layer cut slots in the ground plane, which act as antennas for the RF signal. This increases radiated emissions and can cause the antenna to radiate in unwanted directions.
Ground stitching vias: For 4-layer boards, use via stitching around the perimeter of the RF circuit to ensure the top and inner ground planes are connected at many points. This prevents resonances in the ground plane at RF frequencies.
Single ground reference: Connect all grounds (signal, power, chassis if applicable) to a single reference point to prevent ground loops. With a solid ground plane, this happens naturally.
Chassis ground connection: If the PCB is in a metal enclosure, connect the PCB ground to the chassis at one or two points near the PCB mounting screws. This prevents the chassis from becoming a parasitic antenna.
EMC Design: Beyond Antenna Performance
Regulatory EMC compliance (FCC Part 15B, CE Directive EN 55032) requires controlling unintentional emissions from all digital circuits, not just the intentional RF transmitter.
Common sources of unintentional EMI:
- Clock signals and their harmonics: A 100 MHz MCU clock generates harmonics at 200, 300, 400 MHz… If these reach frequencies used by other services (GPS at 1.575 GHz, cellular bands), they may violate regulatory limits
- Switching regulators: Their switching frequency and harmonics can radiate from PCB traces acting as antennas
- High-speed digital traces: UART at 921600 baud, SPI at 20 MHz — fast edge rates generate broadband noise
EMC mitigation techniques:
- Spread-spectrum clocking: Some MCUs support spreading the clock frequency slightly to distribute the energy in harmonics over a wider bandwidth, reducing peak levels
- Ferrite beads on I/O lines: Series ferrite beads on external cable connections (USB, UART to connectors) prevent cables from radiating internally generated noise
- Shielding cans: Metal cans over the RF module and high-speed digital circuitry contain radiation — used in many consumer IoT products
- Proper PCB layout: Short, direct routing of high-speed signals with continuous ground plane reference reduces radiation
Common Mistakes That Cause PCB Respins
Missing decoupling capacitors: Always add decoupling per the MCU datasheet, not “what looks right.” Missing a 100nF on one power pin can cause the device to work on some boards and not others depending on PCB parasitics.
Wrong crystal load capacitors: Crystal oscillators are sensitive to load capacitor values. Use the values specified in the datasheet calculation, accounting for PCB parasitic capacitance. Wrong values cause frequency offset.
Insufficient test points: Not having test points on key signals makes bringing up EVT boards significantly harder. Always add test points for: all power rails, SWD/JTAG signals, UART debug, and any signal you might need to probe.
Not checking schematic against the datasheet pin descriptions: Pin numbering in schematic libraries sometimes doesn’t match datasheet pin descriptions. Always verify each critical pin connection against the MCU datasheet before sending gerbers to the fab.
For expert IoT hardware design, UABit’s IoT device development team handles schematic design, PCB layout, and pre-compliance testing as part of our hardware development services.
Conclusion
IoT PCB layout for wireless devices requires disciplined application of RF design principles that don’t apply to non-wireless electronics. The antenna keepout zone, 50Ω trace impedance, solid ground planes, and proper power supply filtering are not optional refinements — they’re fundamental requirements for a product that passes regulatory testing and performs reliably in the field. These principles aren’t difficult once you understand them, but skipping or misapplying any of them guarantees problems that are expensive to debug and fix.
Further reading:
- ESP32 hardware design guidelines — Espressif official hardware design guide
- Nordic nRF52 hardware design checklist — Nordic hardware design requirements
- Saturn PCB Toolkit — free impedance and PCB calculator
- IPC-2221 generic standard on PCB design — PCB design standard
- Würth Elektronik RF design guide — comprehensive RF PCB design application note
- Altium Academy EMC design webinars — PCB design for EMC
IoT & AIoT Weekly
Get the best IoT development content delivered weekly. No noise, just signal.